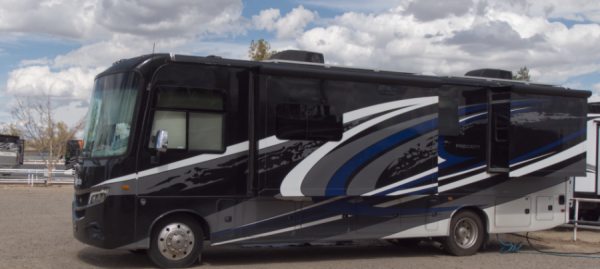
Your recreational vehicle is more than just a vehicle; it is your vacation home, your adventure headquarters, and a significant investment. However, like any home or vehicle, an RV requires consistent, active care to remain reliable. Neglecting simple maintenance tasks invariably leads to expensive, trip-ruining headaches down the line. You empower yourself to enjoy countless journeys without worrying about unexpected breakdowns when you adopt a proactive maintenance routine. You don’t need to be a seasoned mechanic; you only need to commit to these ten easy, essential maintenance tips to ensure your RV runs smoothly and reliably for years to come.
1. Actively Monitor Your Tire Pressure
You must make checking your RV’s tire pressure a non-negotiable part of your pre-trip ritual. Under inflated tires are the number one cause of blowouts, which are not only dangerous but can cause massive damage to your RV’s exterior. You locate the correct cold inflation pressure on the placard inside your RV (often near the driver’s seat or door), not on the sidewall of the tire itself. Use a quality, high-pressure tire gauge to ensure each tire matches the manufacturer’s recommendation before you drive, when the tires are cold. Properly inflated tires improve fuel efficiency, extend tire life, and significantly enhance handling and stability on the highway. We also use a tire monitoring system while driving. It shows the tire pressure and temperature for our motorhome and tow vehicle.
2. Inspect and Treat Your RV Roof Seals
Water intrusion is the single greatest threat to your RV’s structure and interior. You should actively climb onto your roof at least twice a year—ideally in spring and fall—to perform a thorough visual inspection of all seams and seals. Pay close attention to the areas around vents, skylights, antennas, and the roof-to-side-wall junctures. If you notice any cracks, peeling, or signs of deterioration in the sealant, you must immediately clean the area and apply new, appropriate self-leveling sealant. You prevent expensive water damage and mildew when you catch and repair small leaks early.
3. Exercise Your Generator Regularly
If your RV has an onboard generator, you cannot let it sit idle for long periods. Generators need exercise to keep their parts lubricated and prevent fuel gumming up the carburetor. You actively run your generator under a load—meaning you turn on the air conditioner or other appliances—for at least two hours once a month. This simple routine keeps the fuel system fresh, prevents rust, and ensures the generator springs to life when you need it most, especially during boondocking adventures.
4. Maintain Your Battery Bank
Your RV’s house batteries power your lights, furnace, and appliances, making them the heart of your electrical system. If you use flooded lead-acid batteries, you regularly check the water levels and add distilled water as needed to keep the plates submerged. You also actively clean the battery terminals using a wire brush and a mixture of baking soda and water to remove any corrosion. Clean, well-maintained batteries hold a charge longer and last for more seasons. When storing your RV, you either use a smart battery tender or disconnect the batteries entirely to prevent parasitic draws from draining them completely.
5. Flush and Sanitize Your Fresh Water System
You ensure the quality of your drinking and bathing water when you consistently flush and sanitize your fresh water system. At least once a year, or after prolonged storage, you actively drain the fresh water tank completely. Then, you mix a solution of household bleach and water (following specific RV guidelines) and pump it through the entire system, filling the lines and the tank. Let the solution sit for a few hours before draining it and flushing the entire system several times with fresh water until the chlorine smell completely dissipates.
6. Inspect and Lubricate Slides and Jacks
If your RV features slide-outs or hydraulic leveling jacks, you actively keep their moving parts clean and lubricated. You first clean the slide-out mechanism tracks and gear teeth to remove any dirt or debris. Then, you apply a specialized RV slide-out lubricant to the tracks and seals. For hydraulic jacks, you inspect the chrome piston rods for damage and wipe them down before applying hydraulic fluid to the rods, following the manufacturer’s instructions. Smooth, quiet operation confirms you have properly maintained these crucial components.
7. Check and Clean Your Air Conditioning Filters
Your roof-mounted air conditioning unit works hard, especially during the summer heat. You actively keep it running efficiently by regularly checking and cleaning the reusable air filters located in the ceiling vents. Remove the filter covers, take out the foam filters, and wash them with soap and water. Ensure they are completely dry before you replace them. A clean filter significantly improves airflow and reduces the strain on the compressor, cooling your RV more effectively.
8. Inspect Your Propane System
Safety demands you actively check your propane tanks and lines for leaks. You perform a simple leak test by spraying a solution of soapy water on all propane connections—including regulator connections and the hoses leading to your appliances. If you see bubbles forming when the gas is turned on, you immediately turn off the gas and tighten or replace the connection. Furthermore, ensure your RV’s propane detector is functioning correctly by testing it monthly.
9. Test All Safety Devices
You prioritize safety by making sure all your RV’s safety devices are fully functional. This means you actively test the smoke alarm, carbon monoxide detector, and propane leak detector every month. You replace the batteries in the smoke and carbon monoxide detectors annually. I replace ALL batteries (including TV remotes) in May before we take off for the summer trip. You also inspect the condition and expiration date of your fire extinguisher and ensure it is easily accessible in case of emergency. You should make sure an fire extinguisher is placed by the main exit, near the kitchen, in the bedroom, and I place a fire extinguisher in the outside locker by our tow hitch (just in case).
10. Change Your Engine and Generator Oil and Filters
For motorized RVs, you actively follow the manufacturer’s recommended schedule for oil and filter changes on both the main engine and the generator. Engine oil and filter changes are vital for reducing friction and preventing premature wear on internal components. You can perform this essential task yourself or schedule an appointment with a reliable mechanic, but you must not postpone it. Fresh oil ensures longevity and optimal performance for both power plants.
👉 You Might Enjoy This: Diesel Exhaust Fluid: Essential for RV OwnersConclusion
By actively integrating these ten easy maintenance tips into your RV lifestyle, you move beyond merely driving your RV; you actively care for it. This commitment to simple, regular upkeep saves you thousands in potential repairs, eliminates stressful roadside emergencies, and maximizes the priceless freedom you sought when you first purchased your home on wheels. You ensure your RV remains a dependable partner, ready for whatever adventure you chart next.
Frequently Asked Questions About RV Maintenance
Your roof and seals are your RV’s first line of defense against leaks. Inspect them at least twice a year — ideally before and after the rainy season or long trips. Look for cracks, gaps, or worn sealant, and touch up problem areas with RV-grade sealant. Keeping the roof clean and protected from UV rays will extend its life and help you avoid costly water damage.
Many owners remember to check oil, tires, and tanks — but forget smaller details that cause bigger issues later. Overlooked areas often include:
1) Battery fluid levels and corrosion
2) Slide-out seals and mechanisms
3) Black and gray tank sensors
4) Water pump filters
5) Undercarriage bolts and frame rust
A quick monthly walk-around can help you spot small issues before they become expensive repairs.
Before storage, always:
1) Drain and flush all water lines and tanks
2) Add RV antifreeze to protect plumbing (in cold climates)
3) Disconnect or maintain batteries
4) Cover or protect tires from sunlight
5) Seal openings and vents to keep pests out
6) Inspect the roof, seams, and windows for leaks
A simple end-of-season checklist ensures your RV will be road-ready when spring returns.
Even if they look fine, RV tires age out. The general rule: replace them every 5–7 years, or sooner if you see cracking, uneven wear, or sidewall damage. Always check pressure before each trip and store your RV with tires off direct sunlight or on tire pads to prevent flat spots.
Yes — many RV maintenance tasks are DIY-friendly, especially if you enjoy working with your hands. You can easily handle:
1) Checking seals and caulking
2) Monitoring tire pressure and battery health
3) Cleaning the water system
4) Lubricating slide-outs and hinges
However, complex electrical, propane, and structural issues should be left to certified RV technicians. A mix of DIY and professional servicing works best for most RVers.
Skipping maintenance can lead to:
1) Leaks and water damage
2) Tire blowouts
3) Battery or power-system failures
4) Tank clogs and odor issues
5) Reduced resale value
Preventive care saves money in the long run and keeps your RV safe and comfortable on the road.
Check your batteries every 3–6 months for corrosion, fluid levels, and terminal tightness. Clean connections with a baking-soda solution and apply dielectric grease to prevent corrosion. If you store your RV long-term, disconnect batteries or use a maintainer to prevent discharge.
Your fresh, gray, and black tanks all require different care:
1) Flush and sanitize the freshwater tank every few months.
2) Rinse the gray tank to remove buildup from soap and grease.
3) Clean the black tank and remember it is a holding tank and not a septic system.
Always travel with valves closed and empty tanks only at approved dump stations.
Start your engine and generator monthly, even during storage, to keep fluids circulating. Move the RV a few feet to prevent tire flat-spotting, and keep batteries charged. Doing so helps ensure everything works properly the next time you’re ready to hit the road. The worse thing you can do is not use your RV because it was designed to be taken out and used.
Absolutely. Following a consistent schedule is the best way to protect your investment. Most RVers follow these intervals:
1) Monthly: check tires, batteries, and seals
2) Quarterly: test safety systems and clean tanks
3) Annually: inspect roof, brakes, and suspension
Consult your owner’s manual and create a checklist. The checklist will make it easy to stay organized and proactive.